Hosting a Happy Thanksgiving: The Menu

This post is part of a series about hosting a happy holiday meal, one where you aren’t exhausted by or resentful of the work needed, everyone gets to participate in ways that satisfy, and your values and traditions–and energy and money–are respected.

As Bob Belcher joyfully reminds us in every Thanksgiving episode of Bob’s Burgers, Thanksgiving is a cook’s holiday–but a kind cook makes a meal that fits their guests. That means more than just the technical tasks of cooking: it means knowing your people, appreciating their needs and pleasures, then meal planning to make the meal pleasant and welcoming.

A parenting group I’m part of is exploring holidays right now, and it’s been fun to share our not just our menus but our approaches to the food part of the biggest food holiday of the year. Here’s mine–and I’d love to hear yours!

The Questions that Guide Our Menu

Who’s coming?

As the host, one of your jobs is to ensure that everyone feels welcome and appreciated. Can you solve the puzzle of making dishes that anyone can eat while also ensuring that everyone’s favorite food is served or a happy memory triggered? It might not be possible to it all perfectly–after all, someone is likely to follow a vegetarian diet while someone else’s favorite food is turkey–but do your best to ensure that everyone on the table can be enjoyed by almost everyone. And everyone should be able to eat most items on the table. If you invited someone, their need for gluten-free or dairy-free food should be important enough to you to meet it.

What themes will tie this meal together?

We like traditional holiday meals, but “traditional” varies across regions and groups. (Where I’m from, we eat neither dressing nor stuffing but a third thing called filling, which is like if mashed potatoes had a baby with stuffing.) So consider focusing on a tradition–like a New England or Southern or Southwestern focus. Or maybe your theme is childhood memories or indigenous local foods. Or maybe the theme is “subtle tweaks on our family’s traditions.” Whatever it is, a theme gives you some guardrails so you don’t got lost in the options while menu planning and so that, if someone asks what they can bring, you can give them suggestions that keep the final spread focused rather than being a hodgepodge.

What will we most enjoy making? What items will be appreciated if purchased or semi-homemade instead?

If you don’t enjoy making it, don’t make it. Either don’t serve it at all or buy it. I love baking–but not yeast rolls, pies, or pumpkin rolls, though I love to eat them all and have engaged in questionable Facebook Marketplace exchanges for a pumpkin roll. (Seriously, this is how a kidnapper is gonna get me.) Support your economy by buying the things you don’t like to cook from local bakeries or cottage bakers. If you want to serve a turkey but don’t want to cook one, see if local restaurants will sell you one fully ready-to-serve. There is ZERO shame in that, but as I tell judgmental old ladies in the family who ask me if I made the pie myself, “I made the money that bought the pie.” (Or, “Yes, but the recipe is a family secret, and if I tell, my great-grandma’s ghost will haunt me forever.”)

Spend your time cooking the things that are fun for you–including new recipes! (Yes, I try new recipes at holidays, if I trust the source. Because I’m not going to do a dry run of a croquembouche for dinner for three of us! Just be sure you have a backup dish on hand in case it really goes wrong.)

Either skip, delegate, buy, or go semi-homemade for the rest.

And showcase what you truly love to make, including what you’ve grown or preserved yourself already.

What’s non-negotiable? Where can we push tradition a bit?

If everyone on your guest list is down to drop tradition, feel free–but otherwise, let the people who like traditional holiday foods enjoy their day. Find out what is really important to your guests and do your best to meet it. Tinker with recipes within a range that your guests will still find enjoyable, or make two versions of the same dish that share the same prep until the final few steps–for example, plain cranberry sauce and cranberry sauce with oranges and anise, or Brussels sprouts with a dusting of parmesan and another with blue cheese and bacon. And if you personally dislike a dish, rather than futzing with it to increase the chances that you will (since you might not), focus on improving your own technique so that it’s the best version of the dish your guests will appreciate (I’m looking at you, oyster dressing).

Our Menu

  • Appetizers brought by guests OR crudités and cheese and crackers platter
  • Pickle plate, with at least 3 items, including one non-cucumber pickle (beets, cocktail onions, etc), plus olives
  • Cranberry sauce, in all the ways your guests like it: jellied and whole, with an without any added anise, orange peel, walnuts, maple syrup, cinnamon or crushed pineapple
  • Rolls, biscuits, bread, buns, or a fancy, savory tart
  • Turkey; if a vegan or vegetarian is included, add a stuffed acorn or honeynut squash
  • Stuffing, sweet potato casserole, or corn casserole
  • Mashed potatoes, Duchess potatoes, au gratin potatoes, or an ombre of pureed sweet potatoes, mashed parsnips, and mash potatoes in a casserole dish
  • Brussels sprouts or green beans
  • A Jello salad (Why? Because I inherited my great-grandma’s molds and like to use them, plus I live in the Midwest and see assembling fancy Jello salads as an intangible culture tradition)
  • A green salad of winter greens with a bold dressing
  • A candy, nut, or snack mix
  • A chocolate dessert
  • A fall dessert: pumpkin pie, caramel apple pie, apple crisp with cheddar cheese in the crust, pumpkin whoopie pies, a chocolate pecan pie, etc.

What is your menu planning approach? Menu must-haves? Please share!
What’s baking? Pumpkin whoopie pies!

Gazing at a case of whoopie pies–chocolate, peanut butter, red velvet, and other flavors–is perhaps my favorite activity at Lancaster’s Central Market, my favorite place to eat when I’m back home. And pumpkin is my favorite flavor, which is why I created these. They have a cream cheese frosting which is also pretty tasty with red velvet whoopie pies. Hope you enjoy!

This makes 20 oversized pies, 20 regular ones, or 120 minis.

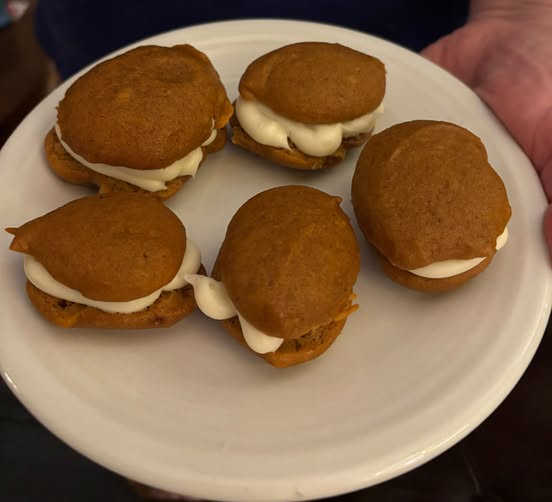
a plate of five mini whoopie pies
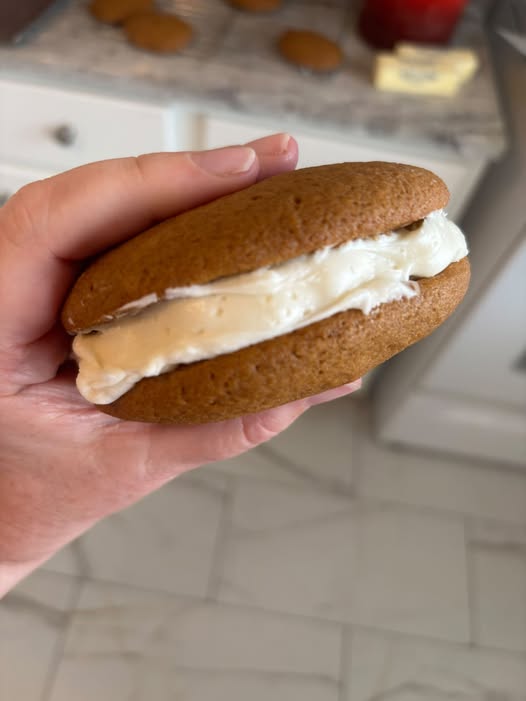
an oversized whoopie pie, held in a hand

Ingredients

for the pies

  • 6 cups all-purpose flour (360g)
  • 2 teaspoon baking soda
  • 2 teaspoon baking powder
  • 2 teaspoon salt
  • 2 teaspoons cardamon
  • 3 teaspoons ground cinnamon
  • 1/2 teaspoon ground cloves
  • 4 teaspoons ground ginger
  • 2 (15-ounce/425g) cans pumpkin puree (not pumpkin pie filling)
  • 4 large eggs, room temperature
  • 4 cups packed light brown sugar
  • 1 1/3 cup vegetable oil
  • 2 tablespoon vanilla extract

For the Filling:

  • 1 stick softened butter
  • 8 ounces room-temperature cream cheese
  • 1 teaspoon vanilla extract
  • pinch of salt
  • 6 cups confectioners’ sugar (360g)

Directions

  1. Preheat over to 350. Line two baking sheets with parchment paper.
  2. Whisk flour, soda, salt, and spices in a large bowl.
  3. In a separate bowl, whisk eggs lightly; add brown sugar, oil, and vanilla and beat well.
  4. Add wet ingredients to dry and mix until no dry streaks remain.
  5. Spoon onto one baking sheet; for oversized whoopie pies, use two large spoons to create pies about 1.5-2 inches in diameter. For regular size, aim for about half that. For minis, use a teaspoon or small melon baller to dollop them on the baking sheet. Space about 1″ apart. (I can easily fit 36 minis on a baking sheet.)
  6. Bake one sheet at a time: 12-14 minutes for oversized; 10-12 for regular, or 8-10 for minis. Cool on baking sheet for 5 minutes, then remove to cooling rack until thoroughly cool.
  7. In the bowl of stand mixer if you have one, cream butter and cream cheese. Add vanilla and salt and mix another 20 seconds. Add confectioners’ sugar slowly, then, when all is added, mix at high speed for 30 seconds. Scrape down sides as needed.
  8. Use a cake decorating bag to pipe filling half of the pies. Top with remaining half. If you’re feeling fancy, you can roll the sides in sprinkles or toasted, chopped pecans.

True Blue Blueberry Cake

A few weeks go, my youngest woke up and said, “I had a dream that I made a blueberry cake, but I’m pretty sure that I did it wrong, because I put the frosting in the batter. How about we try to make that right today?” Well, it took awhile, because he didn’t mean a cake with blueberries in it–he meant a cake that was blue through-and-through, like how a chocolate cake is chocolate, not just dotted with chocolate chips. Makes sense for a kid who dyed every one of his Easter eggs blue until he was 8 years old.

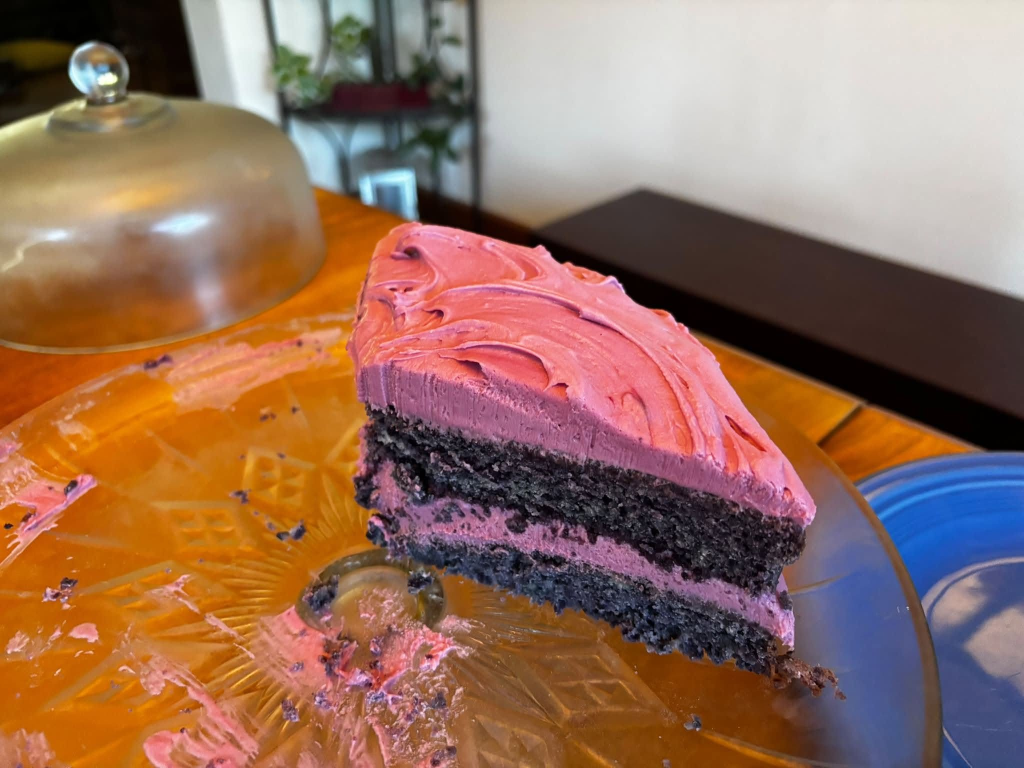
The last few slices of our cake

Here is our final result! Like the Homemade Strawberry Cake from Sally’s Baking, it builds on a white cake recipe. Our secret is to stuff as much blueberry in it–compote, emulsion, and freeze dried–as the batter can handle.

Make this in three stages, with time for cooling in between: compote, cake, and frosting. Also make sure that your eggs, butter, sour cream, and milk are at room temperature for the cake itself and that the milk and cream cheese are at room temperature for the frosting, and leave time for the frosting to cool in the refrigerator before decorating the cake. I strongly recommend weighing your ingredients in this case.

Ingredients:

for the compote

  • 1 lb of blueberries, frozen or fresh
  • 1/4 c sugar
  • 2-3 TBS lemon juice + zest of one lemon
  • pinch of salt

for the cake

  • 295g (2 1/2 c) cake flour, spooned rather than dumped onto your scale or into your measuring cup
  • 2 tsp baking powder
  • 1/2 tsp baking soda
  • 1 tsp salt
  • 3/4 cup (1 1/2 sticks) softened butter
  • 350g (1 3/4 c) sugar
  • 5 room temperature egg whites, yolks reserved for another use
  • 1/3 c full-fat blueberry Greek yogurt or sour cream, at room temperature
  • 2 tsp clear vanilla extract
  • 2 Tbs blueberry emulsion (which we had to order online)
  • 2 drops red food coloring
  • 1/2 cup whole milk, at room temperature
  • 1 c. blueberry compote

for the frosting

  • 1 brick of full-fat cream cheese, softened
  • 1 stick of butter
  • 30 grams (a little over 1 cup) of freeze dried blueberries
  • 3 c. powdered sugar
  • pinch of salt
  • 1 Tbs whole milk, room temperature
  • 1 tsp clear vanilla

Make the compote (20 mins, plus cooling time)

Actually, to make clean up easier, start the whole process by whizzing 30 grams of freeze dried blueberries in your blender to create a powder that will cover and flavor your frosting. Ensure that no chunks remain. Set aside. (Doing this first means you don’t have the wash the blender twice to make this cake.)

Combine blueberries, sugar, lemon juice, lemon zest, and pinch of salt in small saucepan and bring to a boil; reduce heat and simmer 20 minutes, stirring occasionally, as it reduces to about 1 cup. Remove from heat and allow to cool until you can safely transfer to a blender. Blend until a think blend; some chunks can remain. Cool to room temperature. (If you prepare the day before you bake the cake, refrigerate, then bring to room temperature.)

Make the cake (20 mins prep; 40 mins bake; plus cooling)

Preheat oven to 350 degrees F. Spray a round cake pan with cooking spray; line with parchment paper and spray the paper, too. Set aside.

Whisk together dry ingredients: flour, baking powder, baking soda, and salt. Or do what I do and place inside a mixing bowl with a lid and shake vigorously–a fun job for a kid!

In the bowl of a stand mixer, cream sugar and butter by mixing with a paddle attachment on medium-high for about 3 minutes, pausing to scrape down sides as needed. Add egg whites, beating on high for 2 minutes. Add yogurt or sour cream, vanilla, blueberry emulsion, and food coloring and beat until combined, about 1 minute. Stir in dry ingredients. With mixer on low, slowly add milk until just combined. Finally, fold in 1 cup of blueberry compote. (If you have leftover, enjoy on stuffed French toast or baked oatmeal; if you are short.) Mix with a light touch only until no streaks of white are left.

Pour into prepared pans and bake until the center is set and a toothpick inserted in the center comes out clean. I use a 9 inch round pan and it takes about 35 minutes, but my oven is a slow-poke, so check your sooner.

Cool on a baking rack for an hour, then loosen from the pan with a butter knife or offset spatula.

At this point, begin to make the frosting if you’d like to frost the cake today as the frosting requires an hour of refrigeration before being applied–and then will require another hour to set.

Remove from the pan, peel away parchment paper, and continue cooling until the cake is entirely cool.

Make the frosting and assemble, then chill, the cake (1 hour, 40 minutes total time)

Using a handheld mixer or stand mixer with a paddle attachment, beat the butter and cream cheese on medium high until smooth, about 2 minutes, scraping down sides of the bowl as needed.

In a separate bowl, whisk together the powdered blueberries, powdered sugar, and a pinch of salt (or, again, add to a mixing bowl with a lid and shake vigorously). Add to butter and cream cheese, then add milk and vanilla. Beat on low for about 30 seconds, then slowly increase speed to high for three minutes or until smooth and creamy. Refrigerate for an hour.

To assemble the cake, divide in half horizontally with a cake leveling tool or large bread knife. Add about 1/3 of frosting to what will be the first layer and spread to edge. Top with second layer and frost the top and sides. Refrigerate about an hour.

At this point, the cake is ready to serve. If you refrigerate longer, bring to room temperature before serving.

Soup’s On: First Snowfall Chili, a Vegan Chili

We had our first snowfall today, which means we make chili! We love all kinds of chili around here, but this one isn’t just our favorite vegetarian or vegan chili–it’s our overall favorite. It’s hearty, gloppy and warming without being one-note spicy. Even if you think you don’t like squash or sweet potatoes, give them a try here–they don’t taste like what you might expect.

First Snowfall Chili

Our ingredient list includes convenience items, but you can easily make this using dried beans and fresh tomatoes, squash, and sweet potatoes if you prefer, especially as squash and sweet potatoes are in season and you might have the last of the green tomatoes ripening in your garage or basement when the first snow comes; if using the last of those tomatoes, add a 1-2 inch squeeze of double-concentrated tomato paste to improve their flavor.

You can easily halve or even quarter this recipe if you want to make a smaller batch.

  • 2 glugs of olive oil, to saute onions
  • 2 large yellow onions, chopped or, if you have diners who don’t like the texture of onions, 1-2 onions blended into a liquid
  • ▢ 4 tablespoons chili powder
  • ▢ 2 tablespoons cumin
  • ▢ 2 teaspoons salt
  • ▢ 2 teaspoons smoked paprika
  • ▢ 1/2 – 1 teaspoon cayenne powder, optional
  • 8 cloves of garlic, minced or chopped fine
  • 4 28-oz cans of diced tomatoes
  • 2 tablespoons light brown sugar
  • 4 19-oz cans of beans, mixing as many as you prefer: dark red kidney, light red kidney, pinto, black beans, cannellini beans, Italian northern beans, or garbanzo beans. We use whatever we have on hand but always include at least one kind of kidney bean, at least one dark bean, and at least one light bean.
  • 1 bag (10-12 oz) frozen, steam-in-the-bag sweet potatoes
  • 1 bag (10-12 oz) frozen, steam-in-the-bag butternut squash
  1. In a Dutch oven, heat oil to glistening and add onions; cook until golden. Add spices, stirring constantly, for about 30 seconds. Add garlic and stir another 30 seconds.
  2. Quickly, so that spices do not burn, add tomatoes and brown sugar. Add up to 1/2 can of water if the mixture is thick.
  3. Add beans, including liquid in can. Bring to a boil, reduce to a simmer, and cook, uncovered for about an hour, stirring occasionally to avoid beans sticking to the bottom of the pot.
  4. During this time, cook sweet potatoes and butternut squash according to package directions. Drain of any excess liquid, then add to chili. Be sure that the chili cooks with the sweet potatoes and the squash for at least half an hour.
  5. While you can cook this chili for longer, the longer you cook it, the higher the risk that the beans will become mushy.

Serve with your favorite chili toppings, like Fritos, lime-flavored corn chips, and hot sauce.

An Occasional Pie: Atlantic Coast Pie

Regular readers know my issues with pie: making a crust, eating a crust, and syrupy filling. But sometimes you want a pie, and I basically always want this pie in particular, which is salty (trust me–it’s good) and creamy and tart. It’s perfect for winter, when lemons are in season, and it’s also perfect for summer when you want something creamy and cold but not ice cream.

Oops. Someones has a midnight snack before I got to take the photo.

It’s a relatively cheap pie to make, and it’s possible that you have the ingredients on hand already. Plus, it’s one that isn’t all that common, so when you bring it to a dinner party, you’ll usually get to share something new with friends.

This makes two 10-inch pies. If you are using an 8 inch pie plate, adjust the recipe to 3 sleeves of saltines, 1 c. butter, 2/3 c. sugar, 2 cans of milk,   8 eggs, and 1 c. lemon juice.

Ingredients:

For the saltine crust:

  • 4 sleeves of saltine crackers
  • 1- 1 1/4 cup softened unsalted butter (2- 2/12 sticks)
  • 1/2 c sugar

For the filling:

  • 3 cans (14 ounces each) sweetened condensed milk
  • 12 egg yolks
  • 1 1/2 cup lemon juice
  • grated lemon peel
  • Maldon salt

Directions:

Heat oven to 350 degrees.

To make the crust: Crush crackers by hand or using a food processor, being careful not to turn them to dust. Combine with sugar. Knead in the butter. Press into two 10-inch pie plans. Chill for 15 minutes, then bake for 18 minutes or until the crust just begins to brown. Allow to cool at least slightly.

To make the filling: Place milk in mixer bowl, then thoroughly beat in eggs. Add lemon juice and beat well again. Pour into saltine shell and bake for 16 minutes or until the filling has set. Chill thoroughly, then top with Maldon salt (and/or whipped cream) and slice.