During Advent, some friends and I gathered weekly to make seasonal crafts via Zoom. Every part of it was fun, but an especially endearing part was how many people accepted the invitation saying “I stink at crafts, but I’m willing to try.” I love that spirit, and I love that friends were confident that we could do crafts together poorly and still have fun.
To be inclusive, our crafts had to: 1) require few pre-existing skills, 2) require few tools or materials since I bagged them up and delivered them to my friends, 3) be adaptive since our group included children through older adults and people with various abilities. And while most of my friends were from my church, not everyone was, so I chose mostly crafts that were wintertime-themed, not holiday themed.
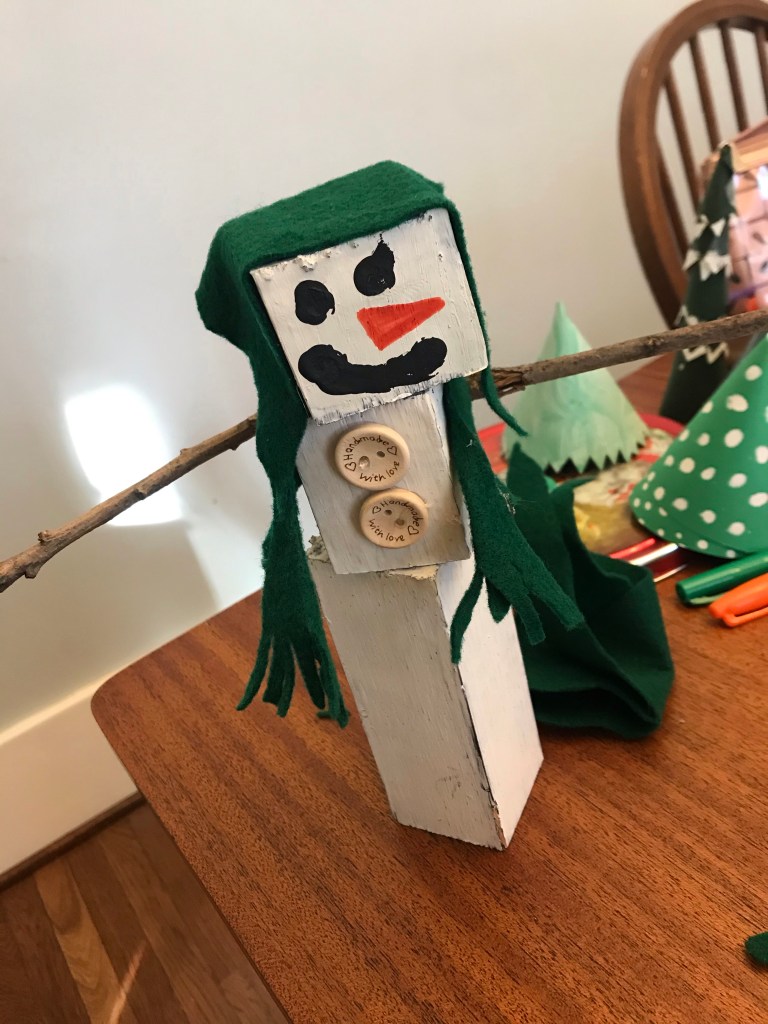
Our final craft was a wooden snowman. Everyone in our group got a head start because I cut the wood and gave it the base layer of paint before I delivered the supplies to them.
Supplies
- 3 pieces of scrap wood of the same width and depth, cut to different lengths. Pieces could be as short as 2″ and up to 8″.
- black, gray, or dark blue craft paint
- white craft paint
- sand paper (optional)
- orange craft paint or an orange Sharpie
- assorted buttons, at least 3
- fabric at least 8 inches long to create a scarf
- twigs to create arms
- materials to make a hat (black stock paper, children’s sock + a ribbon, felt + jingle bell or pom-pom) or ear muffs (chenille stems + pom-poms)
- scissors
- hot glue gun and hot glue stick
- newspaper to create an area to work
Directions
- Paint wooden blocks black, gray, or dark blue.
- Paint again with white paint, allowing some of the darker color to peek through. Add as many layers of white paint as you prefer. When final coat is dry, use sandpaper to scruff it up a bit. The goal is to add depth to the wood by creating areas of darker and lighter wood.
- Select which block will be the head, torso, and bottom, placing them on top of each other to create a thin, tall snowman. Experiment by arranging them in new orders and turning them a bit to different angles, so they are not perfectly stacked on top of each other.
- Hot glue blocks on top of each other.
- Use markers or paint to add eyes, a carrot nose, and a mouth.
- Hot glue buttons in a vertical line on the torso.
- Use hot glue to add sticks to either side of the torso for arms.
- Create a fabric scarf by cutting a long piece of fabric or felt and then nipping the ends to create fringe. Circle around the neck and glue in place with a dot of glue on the rear of the neck. Tie the scarf in front, securing with a dab of glue.
- Create a hat and glue in place.
- Stocking cap: cut the toe off a child’s sock, then create fringe. Tie the fringe off with a ribbon and stuff the sock with scrap fabric or cotton balls.
- Kerchief: Cut fabric into a equilateral triangle and secure with glue on top of the head and under the chin
- Jingle cap: make a cap like for our pine cone elf
- Top hat: cut a circle slightly larger than the top of the head from black cardstock and another slightly larger. Cut a strip that is the circumference of the circle and as wide as you want the hat’s height. Create a ring from the long strip and hot glue it between the two circles to form a hat.
- Ear muffs: double a chenille stem that is slightly more than the length of the width of the head. Hot glue a pom-pom to either end of the stem. Bend into an arc. Glue to head, one pom-pom over each ear.
