
During Advent, some friends and I gathered weekly to make seasonal crafts via Zoom. Every part of it was fun, but an especially endearing part was how many people accepted the invitation saying “I stink at crafts, but I’m willing to try.” I love that spirit, and I love that friends were confident that we could do crafts together poorly and still have fun.
To be inclusive, our crafts had to: 1) require few pre-existing skills, 2) require few tools or materials since I bagged them up and delivered them to my friends, 3) be adaptive since our group included children through older adults and people with various abilities. And while most of my friends were from my church, not everyone was, so I chose mostly crafts that were wintertime-themed, not holiday themed.
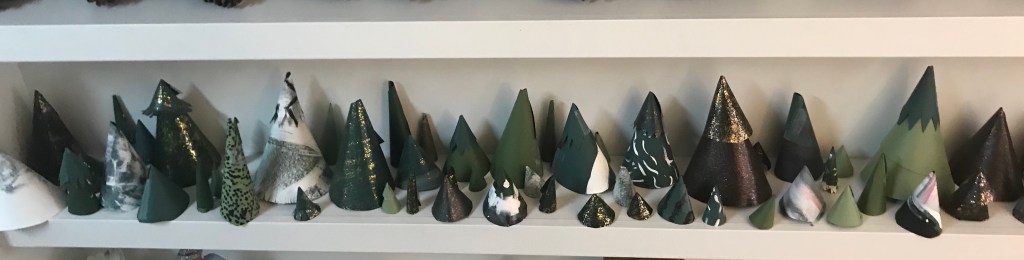
We build an evergreen forest every year at our house, often reusing old trees but in new combinations. Here is how we do it:

Supplies:
- green cardstock of various sizes, with some at least large enough to trace a plate on
- pencil
- compass for creating circles or circles to trace (cereal bowls, plates, containers, etc.)
- scissors
- white craft paint + paint of other colors, such as silver, gold, and rose gold glitter
- hot glue gun and hot glue stick
- newspaper for your workspace
Directions:
- Paint your paper with fun designs. Try polka dots, stripes, leopard print, sponge paint, zig zags, etc.
- When the paper is try, trace a circle on the non-painted side. Cut out.
- Cut a Pac-Man mouth out of each circle. Roll into a cone shape. The larger your mouth, the taller and skinnier the tree. You can even cut each circle in half, then roll the half into a cone. This will create a small overlap of the edges; secure with a line of hot glue.
- Experiment with circles of different sizes and different size cuts to create trees of different sizes.
- Use scissors to cut a zig zag around the bottom edge, or for something softer and more whimsical, cut a wave shape.
- Cut circles of slightly different sizes, then stack the finished cones on top of each other to create trees of multiple layers.
- Use additional markers to draw cardinals or squirrels on the trees, or add Christmas lights.
- Add individual trees to cookie plates, or group together for a centerpiece or to cover a mantle.
- We sometimes hide candies under the trees to help countdown to Advent.
